Posted by: tfsantana | January 12, 2015

Ivan the Terrible

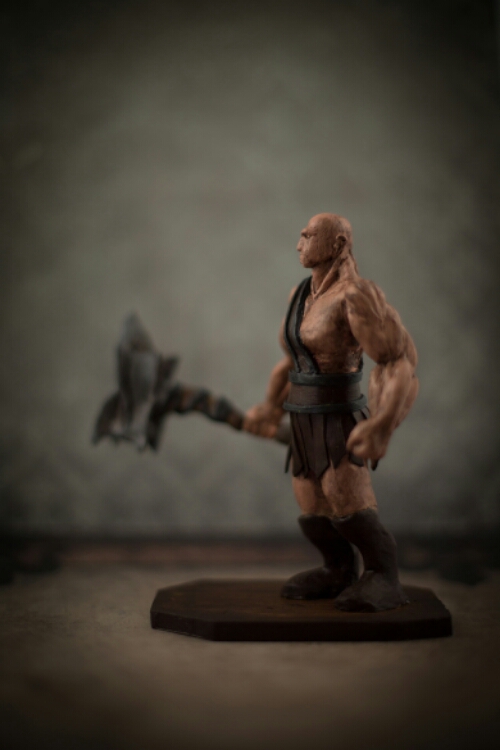
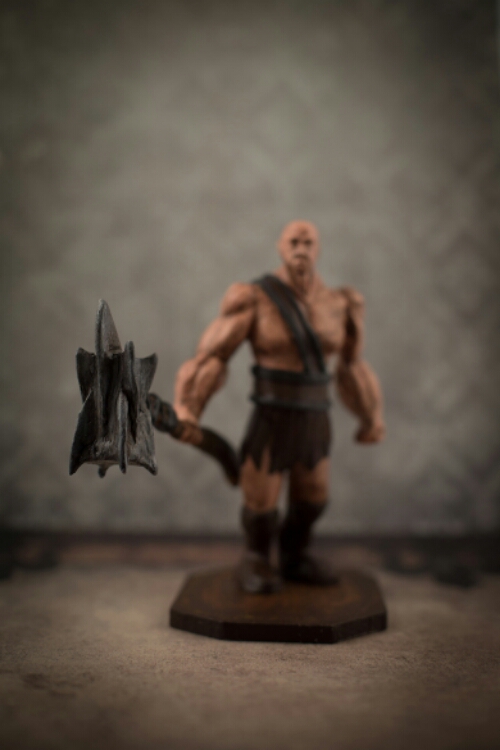
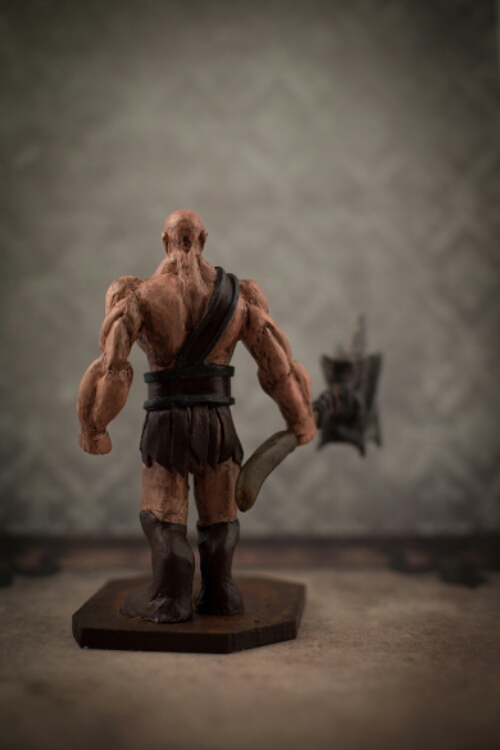
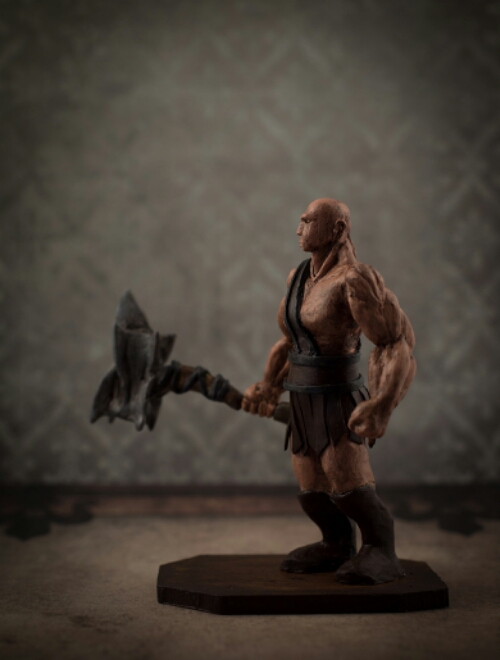
This is Ivan the terrible, he is also a polymer clay figurine I made, I made Ivan during the holiday season. 

image

image

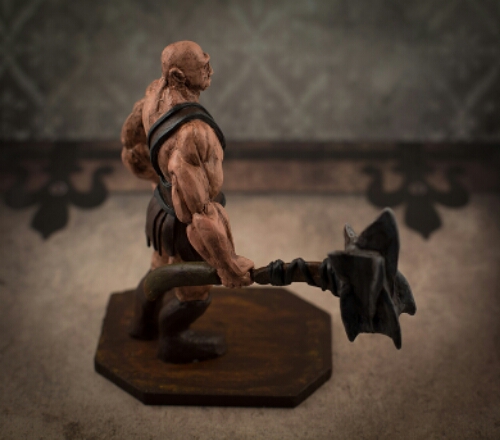
He is about 5″ tall with a simple wire skeleton,  his war hammer was made separately, I used a bamboo skewer for support on the handle.

image

I made it in two parts then slipped it through Ivans hand.

image

image

After painting him I realized it didn’t look right so I did a black ink wash over the entire piece, then I mounted Ivan to a wooden board for support.

image

Now he watches the window for possible intruders!

image

More coming soon!

Advertisement
Posted by: tfsantana | January 2, 2015

The Dragon

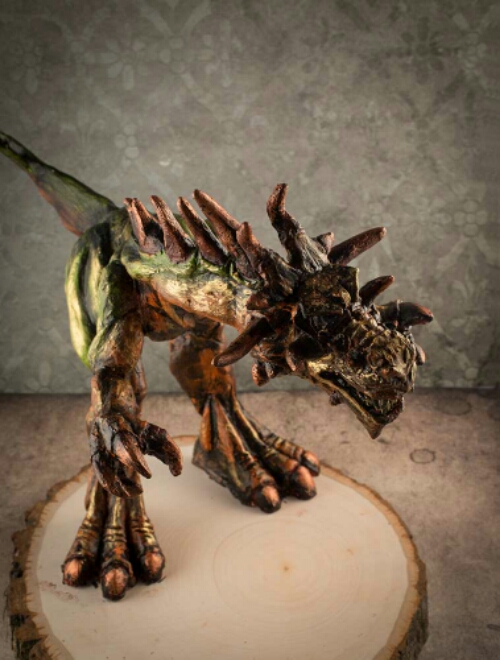
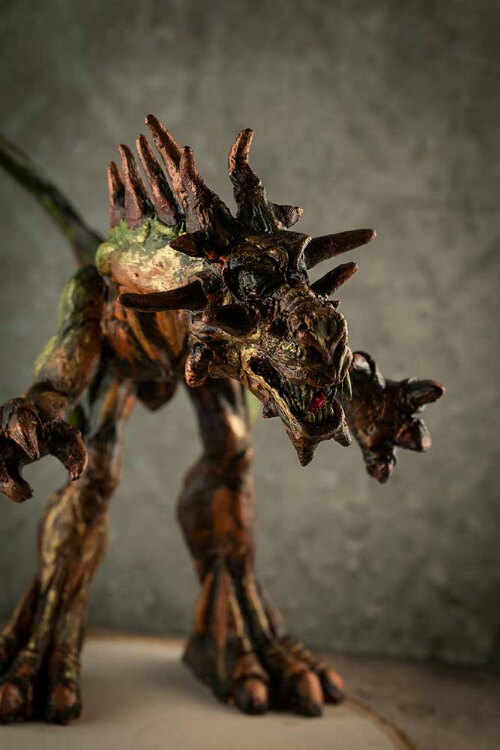
I finished this guy a week or so a go.

image

It’s Polymer clay on a wooden base,  I made it from bits of clay that I had from other pieces.

image

Once baked I primed and painted with acrylic paint.

image

Then I used black acrylic ink to add the dark look.

image

The last thing was adding metallic paint called “inka gold metallic rub” to give it some highlights.

image

He now lives with my friend Johnathan.

Posted by: tfsantana | November 22, 2014

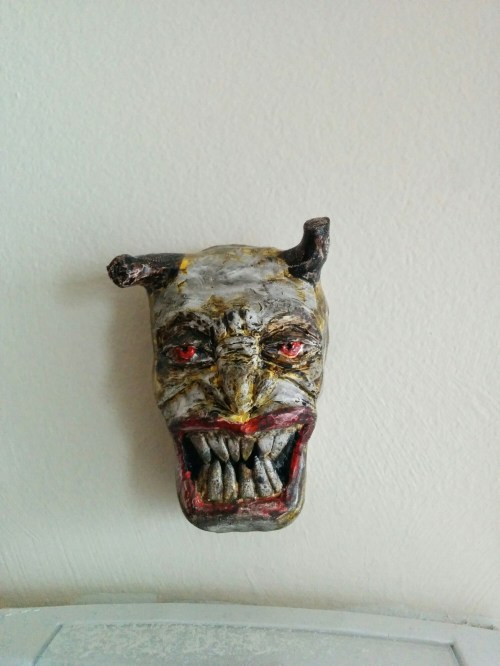
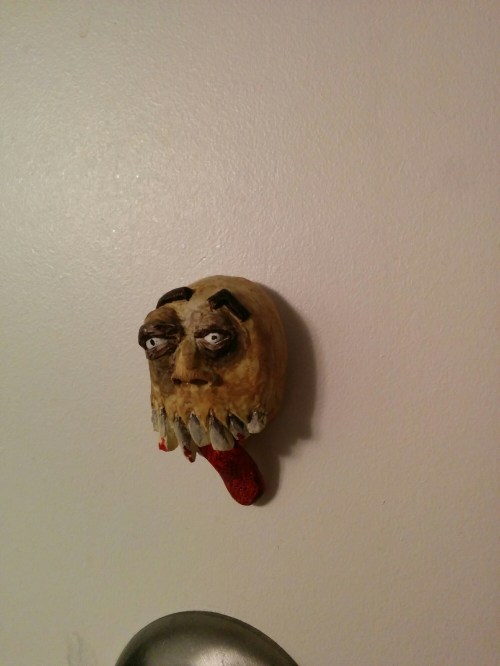
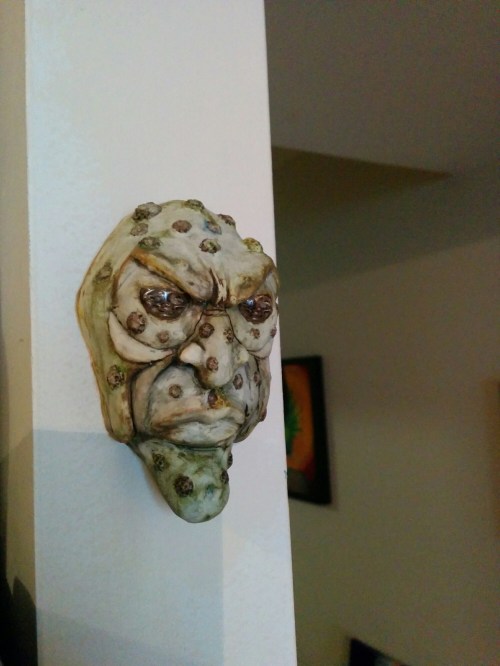
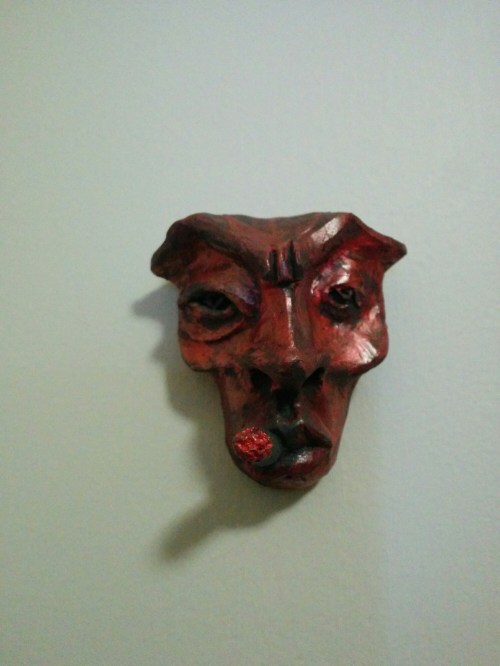
Creepy faces

So here are some little faces I made of polymer clay, I place them all over our home and its funny to see the look on our guests when they come across them.
The pieces are about 4cm in diameter, hand painted with acrylic paint.
Enjoy:

image

image

image

image

image

image

image

image

There are more to come…

Posted by: tfsantana | October 10, 2013

The Football Pitch

Hi,
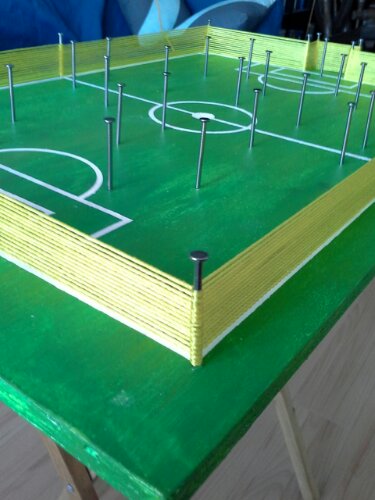
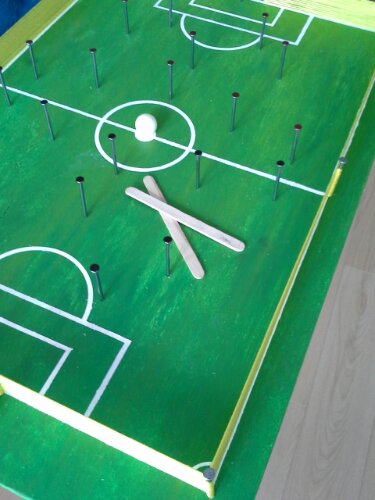
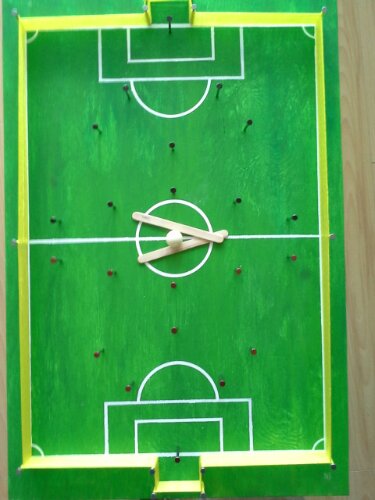
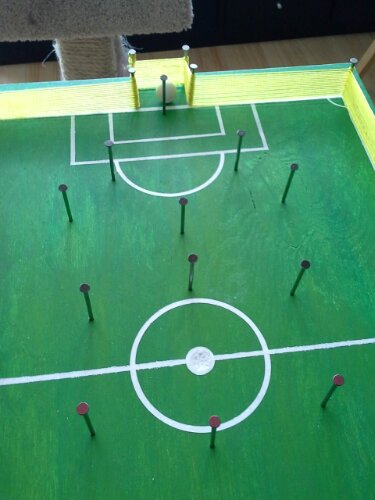
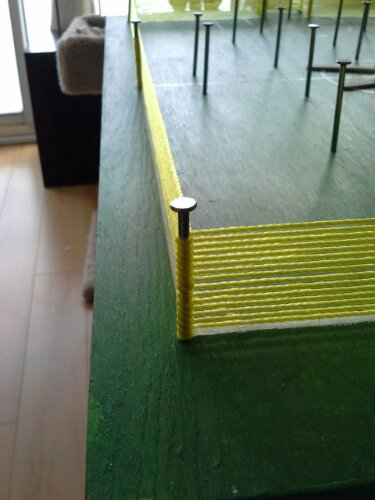
It’s been a while, but here is another post. When I was a little we made this, I’m not sure who came up with the idea, but here it is it reminds me of my youth in El Salvador.
We made them from bent nails and left over plywood.

image

This was one of many toys we made, it wasn’t that we had no money, but that it was something we did.

Half the fun of these things was making them the other half was the fights that we result from bad calls and poor sportsmanship! 

image

I will look for more toys we made and recreate them for more posts.

I encourage you to try making one specialy if you have children,  they might enjoy making analog games.

image

image

image

Posted by: tfsantana | July 18, 2013

Yarn, Nuts and Bolts

So here is something I made for my favorite knitter (she made me the best socks ever) and she needed a display to show her yarn “cakes”.
She also suggested I make a post on how to do it, I figure some will love me for the idea and some will dislike me a lot for creating more work for them… hehehe.
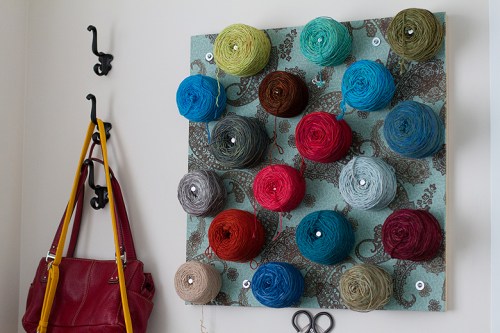
Here it is what it looks like:

IMG_1136

It holds 18 cakes, and it isn’t difficult or time consuming to make.

IMG_1052

These are some of the tools and materials I used, as well as glue, finishing nails and a hammer.

Material list as follows:

  • 1- 2′ x 2′ MDF board
  • 18- 1/4″ bolts, 3″ long
  • 36- 1/4″ washers
  • 36- 1/4″ nuts
  • 10- finishing nails, 3/4″ long
  • 1- 27″ x 27″ cloth (decorative) you can also paint it!
  • 2-3/4″ x 1 1/2″ x 24″ pieces of wood for the backing
  • 4-11/2″ mounting screws
  • Glue (I used wallpaper paste)

IMG_1063

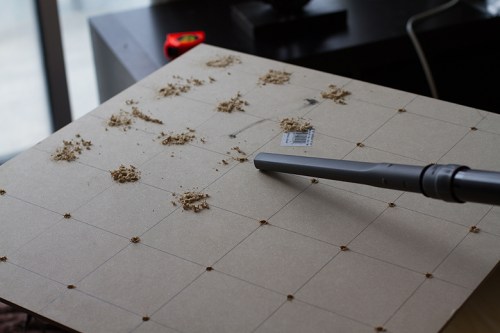
Draw a grid on the back and drill your holes at the corners. We drilled more than we ended up using, based on the size of the yarn cakes. Note the use of the vacuum, great for brownie points!

I used a 1/4″ bit to drill.

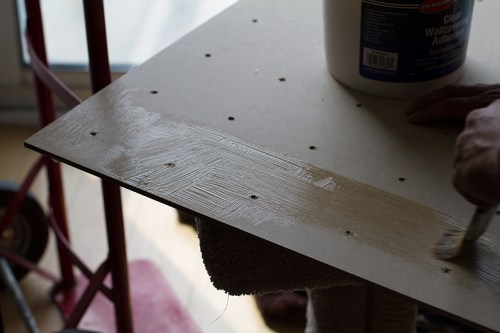
Once the drilling was complete I applied the glue to one side…
IMG_1075

…as evenly as I could.

IMG_1077

Let the glue sit for a bit (don’t stare at it, it’s like watching water boil).

Once the glue is ready, apply the cloth and smooth it out.
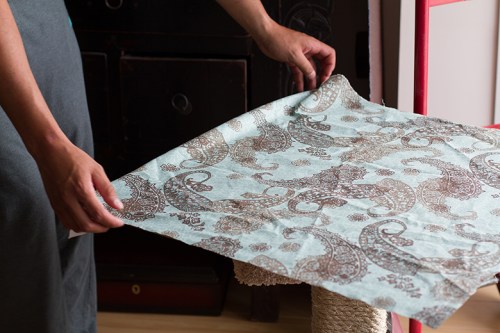
IMG_1079

IMG_1082

Turn it over and apply glue to the outer perimeter of the board and fold over the extra material. Glue and nail one 3/4″ x 1 1/2″ x 24″ to each side
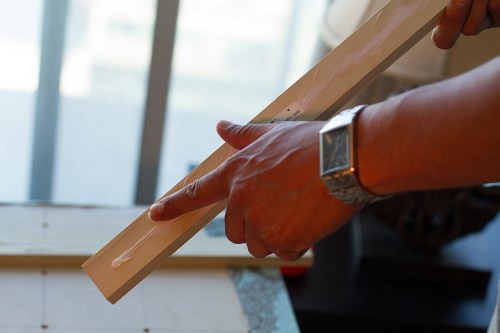
IMG_1099

This will provide the space needed for the nuts holding the bolts in place.
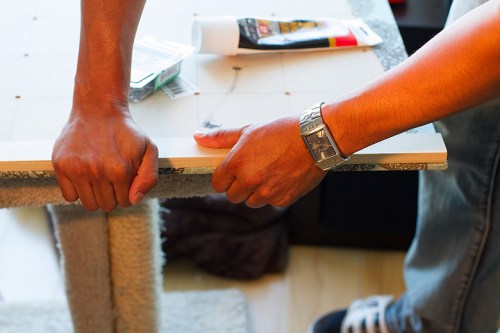
IMG_1102

I used wood glue for these pieces, and finishing nails to reinforce it.

IMG_1106

Now all is left to do is cutting the holes and bolting all 18 bolts (this is where having kids comes handy)

IMG_1111

IMG_1118

Once all holes are cut, screw in one nut and a washer before putting the bolt through the board, once through, place a washer then the last nut and tighten. A socket wrench works best.

IMG_1129

You can also use your hand, since the bolt is not likely to ever hold more than 100g of weight.

I used four 1 1/4″ screws and wall plugs to mount it on the wall.

All in it cost about $30 and two hours of my time, but she loves it and I get more socks =D
IMG_1135

Posted by: tfsantana | May 22, 2013

Down Time

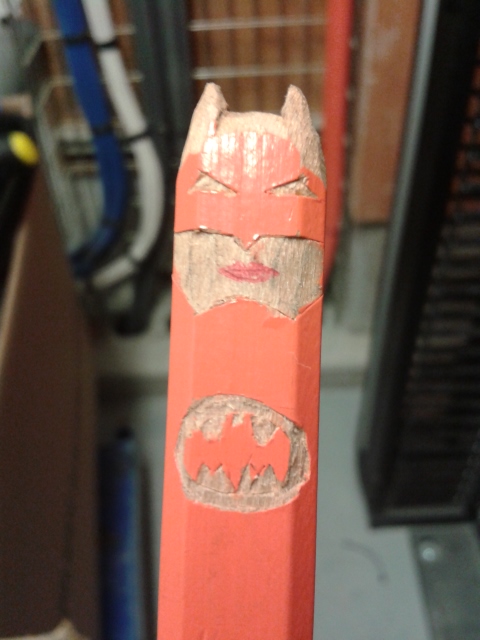
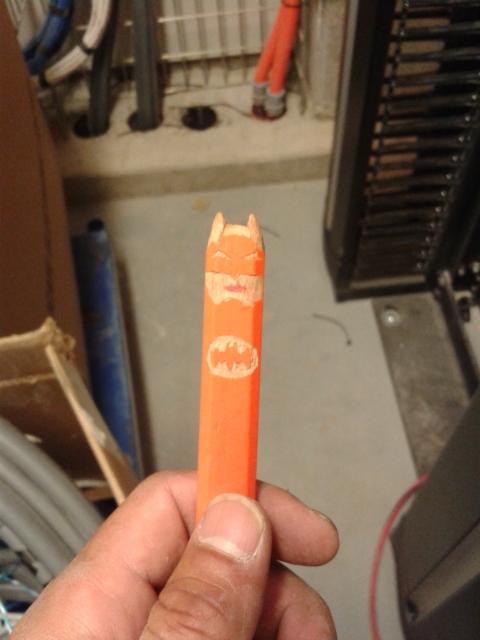
So, what do you do when you have down time? What do you do with the inbetween time?

image

I turned my pencil into batman, then blogged about it!

image

Short blog, after all I am at work ;P

Posted by: tfsantana | May 5, 2013

I Did It

I have been making art for over 20 years yet I have never put my work for show to the public, till yesterday at the Artfusion Festival.
I didn’t sell anything, but it was good to get over that fear and the responce I got was very good.

image

I’m looking forward to the next event where I can show my work and use the experience I got from this show to make some sales 😉
I wanted to thank all my friends who came down to support, it means a lot to me!!!

Posted by: tfsantana | April 28, 2013

6 Days To Go!

Short post today, I’m going a bit crazy with fear, on Saturday May 4th I will be part of The Art Fusion Festival, it will be my first time bringing out my work and putting it for sale.
Its a tough thing to do for me, it has taken over 20 years to show my work and now, pricing it and putting it up for sale, thats very hard, but I’ve had great support from great people who are in my life.
The show will take place at Mel Lastman Square in North York.
All the work this blog will be for sale at my booth!

Posted by: tfsantana | April 10, 2013

The New Banner

I’m back, been a while, but I got caught up with a few things, first I’ve managed to get into an art festival called “The Art Fusion Festival’ taking place on May 4th at Mel Lastman Square Toronto. For more info go to http://www.artfusioncollectives.com. It will be my first time doing anything like this and I hope that it goes well! I’m also hoping to not be the last one I do.
So there is that, as well, I got a brand-new-never-before-had-one awesome logo designed by my partner in crime Shireen Nadir (“The Blue Brick.ca), its up on my banner and my cards are being printed as we speak (well maybe as i write and you read, it also depends when you are reading it! For all we know they are on route to my house or maybe I already have them in my hands)!

TS_logo_1

This is the layout of the back of my card and the front will have a different image from my work on them.

TS_logo_2

This is the logo it self, I had to tweak so it would fit on the banner above, but this is the original. It was a combination of the tattoo on my back (and the only one cause they hurt like F#@&K!!!!) and a luchador mask in reference to the funny coincidence that’s associated to my name, don’t get it? Google my name, see what you get!

I’m also hoping to have some new digital work out in the next few days. And I will be starting a comic strip on this very blog!!

Posted by: tfsantana | February 21, 2013

The other passion

I love to make art, here are other stuff I love doing as well, I can’t work at a large scale due to the size of my space, but I still try to make something with it, nothing here is taller than a foot.

titosantana©2013 titosantana©2013

This is Salomon, paper mache and acrylic paint. Photography by Shireen Nadir.

He is a combination of newsprint and toilet paper, and a glue and water mix, I don’t want it to rot ;P

titosantana©2013titosantana©2013

This is “Thoughts” this is piece started while at a jobsite I had to wait for a guy to finish his job so I could do mine, to kill time I picked up a piece of scrap grounding wire and started to peel it back and coiling it at different lengths then I took some bit of telephone wire peel them and added them to the tree, I threw it in my pocket and finish what I had to do.

titosantana©2013titosantana©2013

When I got home I had this face I’ve made before from self-setting clay, drilled his forehead and stuck the tree in! Painted and podgy the face, there you have it, it’s about 7 inches tall.

titosantana©2013


Older Posts »

Categories

eCharta

The blog

Hollis Plample

draws comics

Ash N. Finn

Writing is ..., it just is ...

Vikram Roy's Blog

A Personal Collection of Blogs

The Jiggly Bits

...because life is funny.

Alanemartinez's Blog

Just another day in the trenches...

Wonderful Cinema

Short reviews on high quality films. No spoilers.

Ray Ferrer - Emotion on Canvas

** OFFICIAL Site of Artist Ray Ferrer **

Doll With a Frown

Art & Love by Grace

surface & surface

Art & Design Choice Cuts